My son just turned the big O-N-E, I can't believe he is already one and walking all over the place, they grow up so fast. For his first birthday, we threw him a construction party. I have wanted to throw a construction party since I had my first son and finally got around to throwing one. Since I took my second son's newborn pictures in a toy dump truck I thought it was only fitting that he had a construction party. Isn't he cute!
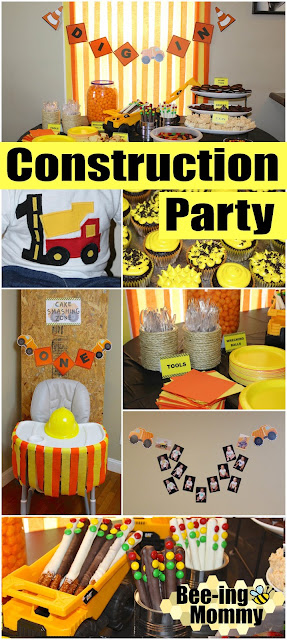
As usual, I made everything myself and used Pinterest to help come up with a few ideas. You can go all out for a party without breaking the bank by making your own decorations. Here are some pictures from my son's party:
Birthday Outfit:
My grandmother once again made my little one's first birthday shirt. She loves to sew and quilt and has done an amazing job on all three shirts she has made for my kids parties. We both drew out the design and she cut out the fabric and made the design come to life.
I think it turned out pretty cute! I bought the the solid white shirt from Hobby Lobby for around $3. My grandmother already had the rest of the fabric used.
I think it turned out pretty cute! I bought the the solid white shirt from Hobby Lobby for around $3. My grandmother already had the rest of the fabric used.
You can check out her Etsy page HERE (she hasn't posted any birthday shirts yet but may soon). You can check out the other shirts she made me here: Elephant Onesie and Monster Shirt.
I tried to come up with food and food labels that related to the construction theme. There are tons of different things you could do for food. My favorites were the Build your own Pizza/Burger/Taco station but because of the time of our party we decided to go with snack/dessert foods.
The construction labels and food I used:
- Tools - Utensils (not food)
- Traffic Lights - Chocolate covered pretzel sticks with M&M's to look like traffic lights
- Spare Tires - Oreos
- Bricks - Chocolate Fudge
- 2x4's - Rice Krispie Treats
- Wrecking Balls - Cheese Balls
- Boulders - Mini Pigs in a Blanket
- Top Soil - Dirt Pudding
- Gravel - Reese Pieces
Other construction labels and food possibilities are:
- Build Your Own ____ Bar - Burger, Taco, Pizza, Ice Cream Sundae
- Traffic Cones - Candy Corn, Bugels, Rice Krispies in shape of traffic cones, Carrot Sticks
- Boulders/Wrecking Balls - Mini Pigs in a Blanket, Meatballs, Sausage Balls, Mini Sandwiches, Rolls, Brownies, Grapes, Oranges, Cheese Balls, Mini Chocolate Donuts or Donut Holes, Gum Balls
- Spare Tires - Oreos, Mini Chocolate Donuts, Cookies, Lifesaver Gummy Rings
- Gravel/Pebbles/Rocks - Reese Pieces, M&M's, Chocolate Rock Candy, Puppy Chow, Chocolate covered Raisins or Nuts
- Plywood/2x4's/Lumber - Rice Krispie Treats, Graham Crackers, Vanilla Wafer Bar Cookies, Pretzels, Veggie Straws, Cheese Sticks
- Nuts & Bolts - Chex Mix, Trail Mix, Popcorn Party Mix
- Drill Bites - Pasta Salad, Cinnamon Twists from Taco Bell, Curly Fries, Fritos Twist Chips
- Traffic Lights - Chocolate covered pretzel sticks, Brownies or Rice Krispies with M&M's to look like traffic lights
- Ropes/Cables - Twizzlers, Cheese Sticks, Nerd Ropes, Pixie Sticks, Sour Straws
- Measuring Tape - Bubble Gum Tape, Sour Straws
- Worms - Gummy Worms
- Bulldozer Tracks - Chocolate Wafer Bar Cookies
- Dip Ahead - Party dip with chips, fruit, vegetables to go with the dip
- Construction Workers - Teddy Grahams
There are tons of different food ideas and labels that can go with a construction party, these are just a few to help give you some other ideas incase you didn't like mine. If you come up with more creative food/label ideas feel free to share in the comments below!
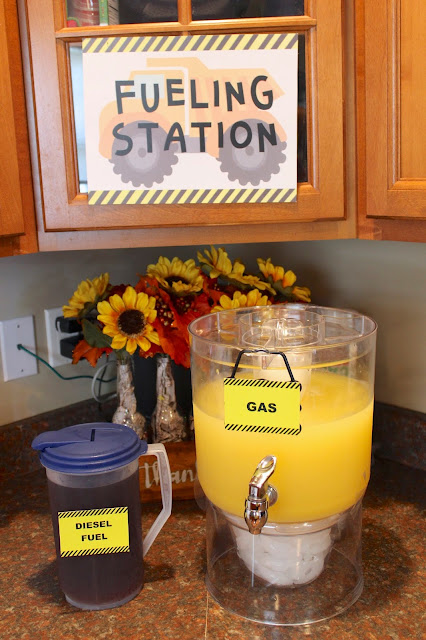
- Sweet Tea labeled as "Diesel Fuel"
- Pineapple Punch* labeled as "Gas"
- Orange Hawaiian Punch
- Water
- Juice Pouches
*Punch Recipe: 2 cups Country Time Lemonade Powder, 64oz chilled Pineapple Juice, 2L Sprite, 2 cups cold water
The punch was so good, probably the best party punch we have had at a party, special thanks to my husband for finding the recipe and making it!
I also created and posted a sign above the beverages that said "Fueling Station".
Smash Cake & Cupcakes:
I made a chocolate smash cake using a small glass dish I have. I bought yellow frosting, whipped it to make it easier to work with and frosted the cake.
I then used the biggest circle icing tip I had to decorate the bottom of the cake with dots. I crushed up some Oreos and sprinkled them on top.
Add a small construction vehicle and a candle and you have a cute construction smash cake. The cake was about the size of three cupcakes.
I then used the biggest circle icing tip I had to decorate the bottom of the cake with dots. I crushed up some Oreos and sprinkled them on top.
Add a small construction vehicle and a candle and you have a cute construction smash cake. The cake was about the size of three cupcakes.
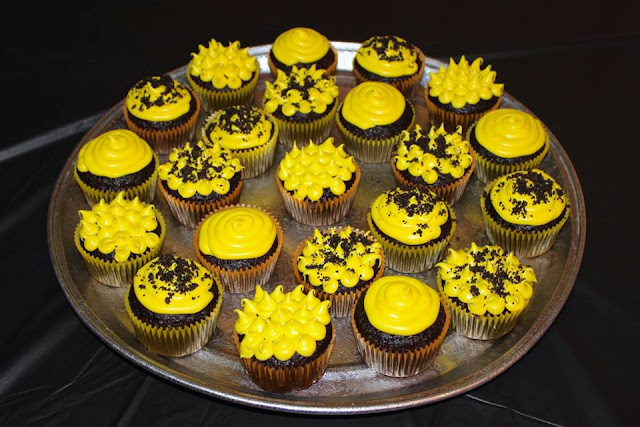
I then used the rest of the batter to make cupcakes. I used the same circle icing tip for the cupcakes. I swirled a couple and created spikes on others. I then sprinkled some crushed Oreos on top of a few to make it look like dirt. The cupcakes turned out very cute and looked a lot nicer in person.
Decorations:
Invitation:
I created my son's birthday invitation from scratch and even took the picture used. If you have been following my blog you know I love photography and designing things. I sent the invitation via e-mail and messenger to our family to save on postage plus everybody ends up throwing invitations away so why waste paper?
If you are inviting guests that live close to you, you can print off the invitations and give them to your guest in person.
If you are inviting guests that live close to you, you can print off the invitations and give them to your guest in person.
Work Zones:
I made a few signs to label different stations I had set up around the house. The stations included:
- Cake Smashing Zone - above the high chair
- Fueling Station - above the beverages
- Toddler Work Zone - above several toys I had pulled out such as a tool bench, dump trucks and a bulldozer that matched the theme for the children to play with. If it is warm outside you can always have this as a sand pit or building blocks area.
- Dump Gift Here - above the gifts table. I thought it would be cute to have the gifts placed in a wheelbarrow but unfortunately I didn't know anybody that had one. The coffee table got the job done since it is perfect height for my little one.
Food Table:
- Yellow and orange streamers were taped behind the food table to cover the window. I made a "Dig In" banner and hung it above the table as well. I may make a blog about how to make a banner but for now here is the quick tutorial - make or find images, print, cut, hole punch, run sting through, hang.
- I also designed and printed out labels to place in front of the food.
- The tools aka utensil holders are decorated formula cans. You can find out how they were made HERE. The Traffic Light pretzels are place in a toy dump truck and formula cans. I think the pretzels turned out pretty cute thanks to my mother-in-law for making them!
High Chair:
I originally made the "ONE" banner to go around the high chair but I didn't like how it looked so I changed it the night before the party.
We pulled a wood shelf from the garage and placed it behind the high chair. Taped the "Cake Smashing Zone" sign and the "ONE" banner to the wood shelf then taped yellow and orange streamers to the high chair.
We pulled a wood shelf from the garage and placed it behind the high chair. Taped the "Cake Smashing Zone" sign and the "ONE" banner to the wood shelf then taped yellow and orange streamers to the high chair.
The construction hat pictured was given to me from my mom as a toy for the kids. I laughed and told her that was going to be my little one's party theme so it worked out perfect besides my little one not wanting to wear it. I'm not sure where you can get a construction hat from, possibly a party store or in the party section at Hobby Lobby.
***Check out more Decorative High Chair Ideas HERE!***
"Watch Me Grow" Pictures:
Since this was my son's first birthday party I wanted a way to display his "Watch Me Grow" newborn to one pictures. The only thing I could think of that I liked was making it look like the dump trucks were dumping the pictures out. I think it turned out pretty cute.
If you don't like this idea you may be able to place the pictures in a circle and make them look like a wrecking ball.
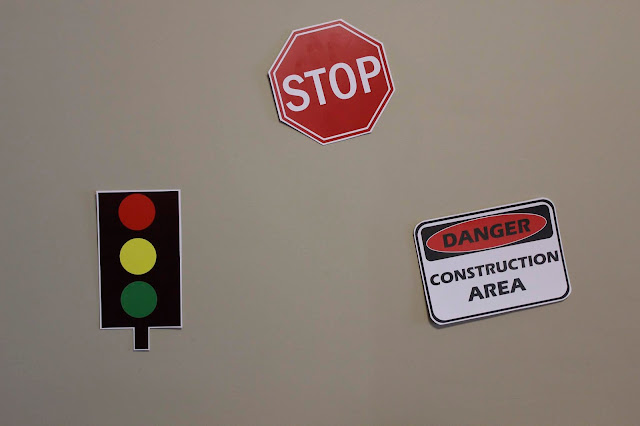
I searched for free construction clipart and free construction printables, found a few I liked and pulled them into a Word document. I also made some of my own so the banners and signs would say what I wanted.
I then asked if someone who had access to a nice printer could print the images out for me. Once printed, I cut the images out and taped them up around the house or turned them into banners.
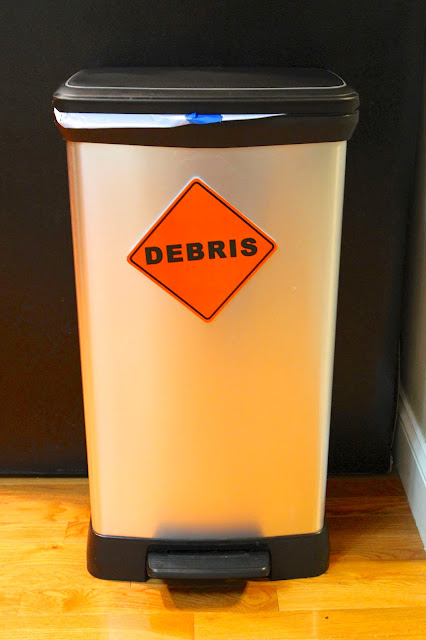
I tried to be funny with the placement of a few of the signs such as "Debris" on the trash can, "Danger Construction Area" on the front door and "Do Not Enter" on the bathroom door although nobody said anything we thought it was cute.
If you have a printer, you can easily print the images out at home, you just need to make sure your printer is set to quality not speed. This will make the images look nicer. I also recommend printing them on cardstock paper if possible. You may also be able to print the images out at your local library for cheap.
I found some of the construction signs I used from the blog, Baby Shower Ideas 4 U. Here is the link to their free printable. You can find the Dump Truck Free clipart HERE.
My son's first Birthday party was a success and I think everything turned out super cute! My son was blessed with tons of new winter outfits and toys. He was unsure about all the people and followed daddy around but he loved the smash cake. He was my first kid to dig in and make a mess without us helping.
As far as cost goes, we had to buy the table cloth, plates, napkins, streamers and the food/supplies to make the food so we didn't spend to much since all the party supplies were dollar items and we have several left. That's the benefit of being crafty and making all the decorations and cake yourself, you save money! I hope you enjoyed my son's Construction Birthday Party pictures and that they help inspire you when planning your child's Construction Party!









5 Comments
Thank you, I'm glad you liked it and saved it!
ReplyDeleteWhere did you get your food labels from?
ReplyDeleteI made them myself using the border I created for the invitation!
DeleteI have to admit I really liked your blog. It is so helpful for me trying to figure out my sons 2nd birthday. Like you trying to keep it on a budget. Very Helpful. Thank you.
ReplyDeleteThank you so much, that is such a great compliment! I'm glad you enjoyed this post and that it helped you out. Budget friendly parties are the best!!!
Delete