I purchased a white t-shirt for around $2 at Walmart. I then drew and cut out the one and the monster on computer paper. I visited my Grandmother's house who has a closet full of fabric and picked out two different fabrics to match the blue/green color scheme and the monster theme. I then told my grandmother what I was thinking and she took it from there. She did an awesome job making my son's first Birthday shirt!
If you know how to sew and have the proper equipment, I recommend trying to make your toddler's outfit. If not they sell birthday outfits on different websites for $40 up.
Food Table:I tried to make all food match the monster party theme by making labels and keeping with the blue and green color scheme.
The food table consisted of:
- Doritos labeled "Monster Teeth"
- Popcorn, Pretzel, Green and Blue M&M's, Nut and White Chocolate mix labeled "Monster Munch"
- Cheese Balls labeled "Monster Balls"
- Fruit by the Foot Rolls labeled "Monster Tongues"
- Chocolate Pretzel Bites labeled "Monster Eyes"
- Mini Pigs in a Blanket labeled "Monster Toes"
- Deviled Eggs dyed green with olives to make them look like Monster Eyes
- Blue Raspberry Cupcakes labeled "Mini Monsters"
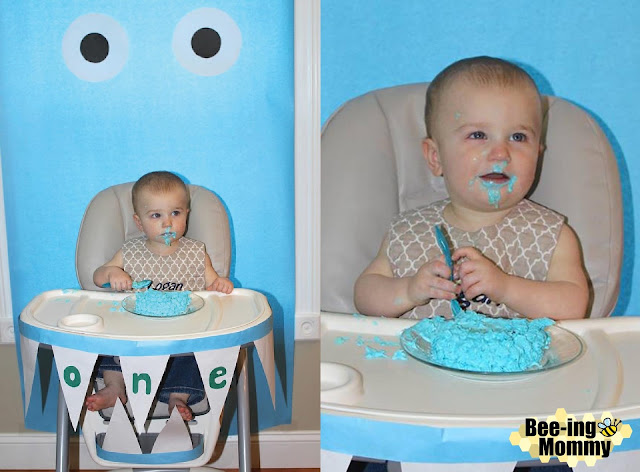
 I baked a blue raspberry smash cake and made cupcakes with the extra batter. I decorated the cake and cupcakes with blue raspberry frosting. I pipped the frosting on the cake and cupcakes using a #21 piping tip. I added candy eyes to the cupcakes to make them look like monsters. I was going to put them on the cake too but I didn't want my son to choke on them since he doesn't really have any teeth so I attempted to make monster eyes out of mini Oreos and frosting.
My son wasn't huge on the cake so we had to give him a spoon to get him to eat some of it but he did enjoy the frosting!
Check out my Monster Smash Cake Tutorial.
Beverages:
- A few 2Liters
- Sweet Tea
- Water
- Juice Boxes for the kids
- Green Hawaiian Punch/Lemonade mix I labeled as "Monster Slime"
- Water
- Juice Boxes for the kids
- Green Hawaiian Punch/Lemonade mix I labeled as "Monster Slime"
Decorations:
I decided to be crafty since we are on a budget and made all of the decorations for the monster party. The majority of the decorations are made from paper so it is super cheap and I think they turned out super cute!
Name Blocks:
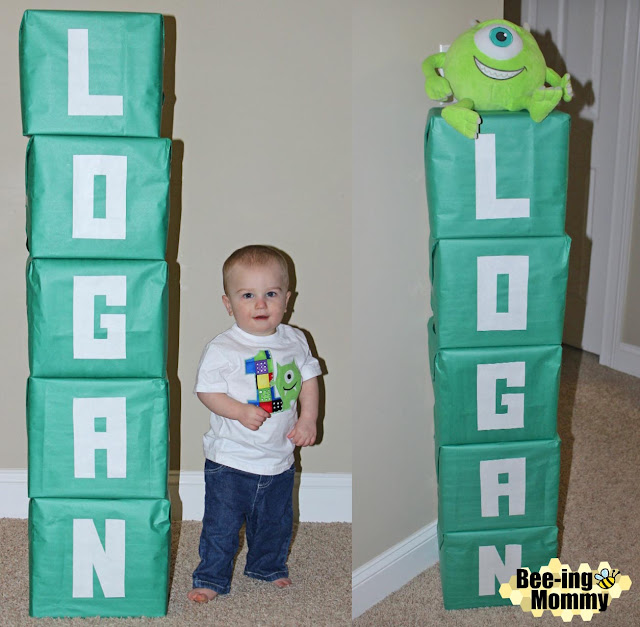
We had name blocks by the door with Mike from Monster's Inc. sitting on top. The name blocks are a cute decoration and a cute photo prop. You can find out how I made the name blocks HERE.

Monster Tissue Boxes:
You can find out how I made the Monster Tissue Boxes HERE!


I decided to be crafty since we are on a budget and made all of the decorations for the monster party. The majority of the decorations are made from paper so it is super cheap and I think they turned out super cute!
Name Blocks:
We had name blocks by the door with Mike from Monster's Inc. sitting on top. The name blocks are a cute decoration and a cute photo prop. You can find out how I made the name blocks HERE.

Paper Wall Monsters:
I created three monsters to hang on the wall above the gift table. I made these monsters out of art paper rolls but you can use wrapping paper, poster board, or construction paper to make your monsters. The monsters I made are about two feet tall but you can make them as big or as little as you want.
"Watch Me Grow" Pictures:
We covered the door and the window in the kitchen with blue paper, table cloths will work too. I then made eyes out of construction paper and taped them onto the blue paper. Since it is my son's first birthday, I printed out my son's newborn to 12 month "Watch Me Grow" photos and hung them over the food table, creating a happy monster face.
High Chair Decorations:
Like I said above, we covered the door and the window in the kitchen with blue paper, table cloths will work too. I then made eyes out of construction paper and taped them onto the blue paper. I cut out seven white pointy teeth and the letters O-N-E out of construction paper. I then cut a strip of blue paper and glued the teeth to the blue strip. Next I glued the letters O-N-E onto the three middle teeth. I taped the finished teeth to the high chair. When you back up, the window cover and the high chair decorations look like a monster.
Monster Tissue Boxes:
I made monster table decorations out of empty tissue boxes, construction paper, and pipe cleaners. I used one of the Monster Tissue boxes as a utensil holder and the other as a table decoration.
You can find out how I made the Monster Tissue Boxes HERE!
Signs:
I made an enter sign that I hung on the front door that said " BEWARE, enter at your own risk". I thought it was only appropriate since there where tons of little monsters in the house.
I also made a sign that consisted of different facts and things my son can do, say, eat, and loves. I had planned on having the sign in a frame on the food table but I printed it to big and didn't feel like wasting ink to re-print them so I just hung them on the wall by the food table.
I created both signs on the computer and printed them out.

My son's first Birthday party was a success and I think everything turned out super cute! My son was blessed with tons of new summer outfits and toys. He was unsure about all the people and the cake but overall everybody had a good time. As far as cost goes, we only had to buy some of the food and the table cloths because we had all the other supplies. Thats the benefit of being crafty and making all the decorations and cake yourself! I hope you enjoyed my son's Monster Birthday Party pictures and that they help inspire you when planning your child's Monster Party!


0 Comments