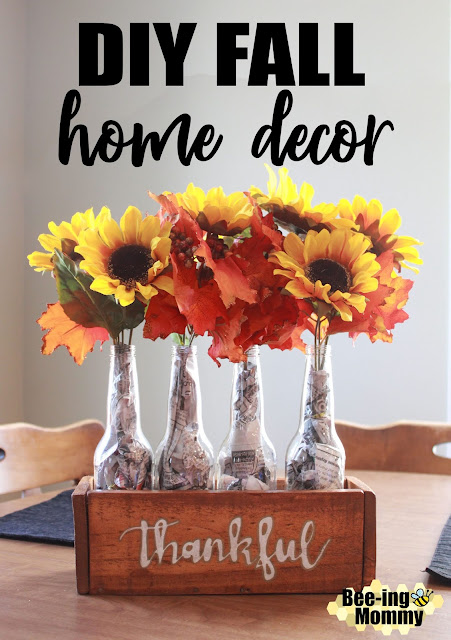
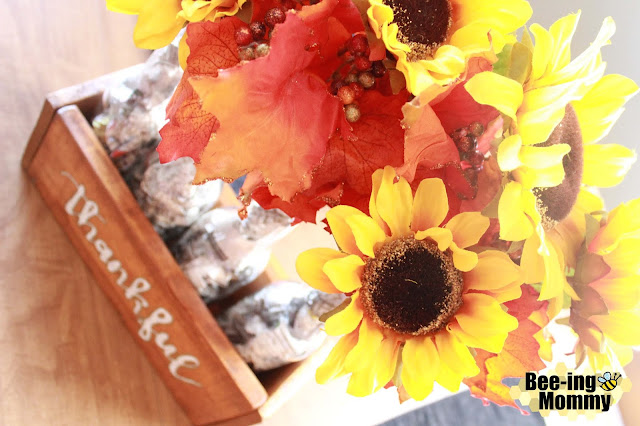
This fall I realized that I have officially lived in my house for three years and I have never decorated for fall besides setting out the pumpkins we carve every year so I decided to make a change. With my husbands help I made a couple different fall decorations out of scrap wood we had sitting around. One of my new fall decorations is this beautiful wood centerpiece. We also made a Wood Scrap Pumpkin and a Happy Fall/Merry Christmas reversible sign.
I used supplies I had sitting around the house and picked out some artificial flowers on sale at Michael's thus spending about $5.
The best part about the wood centerpiece is that you can personalize it how ever you want to make it the perfect decoration for any holiday or season. You can change the word and the type of flowers or even make it reversible depending on where you are planning on placing it in your home.
- Wood Scraps
- Sander
- Hammer & Nails
- Wood Stain & Paint Brush
- White & Gold Paint Pens
- Clear Gloss Wood Sealer - Optional
- 4 Glass Bottles
- Artificial Flowers - I used 1 sunflower and 1 leaf bundle
- Wire Cutter
- Floral Tape - Optional
- Newspaper or other filler
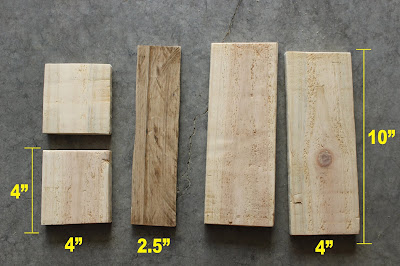
1. Cut and Sand five pieces of wood to the proper size. The wood doesn't have to be perfect but it has to be long enough and wide enough to fit four glass bottles in it. My husband cut some scrap pallet wood to the following sizes:
- Sides - Two 10"x 4"
- Ends - Two 4" x 4"
- Bottom - 10" x 2.5"
2. Using a hammer and nails, piece together the sides to create the wood holder.
NOTE: I'm sure wood glue would hold the pieces together as well but I am an inpatient person and prefer to use nails because it is less likely to come apart.
3. Stain the wood a color of choice. Let Dry.
I used an old stain that we had left over. Color: Colonial Maple
4. Decide what you want your centerpiece to say. Hand write it or print it out in a font you like.
I was debating between Thankful and Grateful since I was making the wood centerpiece for fall. As you can tell I chose Thankful. I considered painting Grateful on the reverse side but decided not to. You can personalize the wood with any word or phrase you want to better suit your home.
5. Transfer the words onto the wood. You can do this several different ways. In this case, I placed my words on top of the wood and centered them. I used a ball-point pen and gently traced over the words thus creating a small outline in the wood. If you look closely you can see the outline in the picture below.
*** Check out Step 4 in my blog, Growth Chart Ruler Tutorial, for another way you can transfer the words onto the wood.
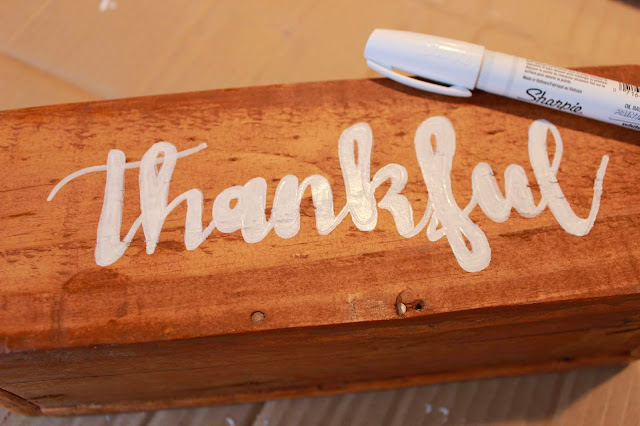
6. Fill in the word with a paint paint pen or white paint. Let Dry.
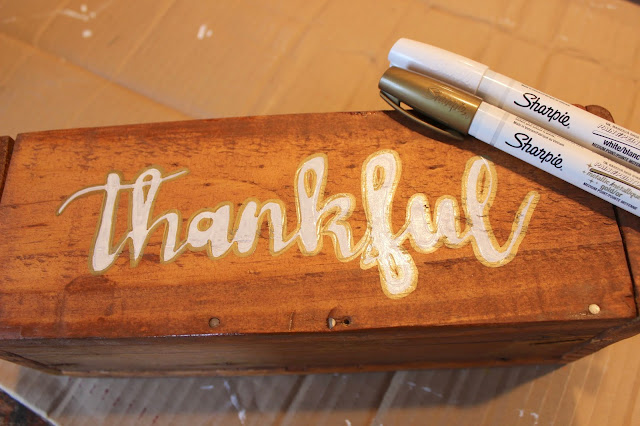
7. Optional: Trace the word with a gold paint pen. Let Dry.
Tracing the word helps make the word stand out from the wood.
8. Optional: Seal the word and wood with a wood sealer to help it last longer. It also ads a glossy shine. Let Dry.
8. Optional: Seal the word and wood with a wood sealer to help it last longer. It also ads a glossy shine. Let Dry.
9. Separate the artificial flowers with a wire cutter. Arrange how you'd like and wrap the bottoms with some floral tape. Wrapping the bottom of the flowers with floral tape is optional but it will help keep the flower arrangements together and is safer for your children in case they happen to pull the flowers out of the centerpiece so they don't get cut by the metal ends of the flowers.
I purchased my artificial flowers from Michaels. They were having a fall sale so I paid around $5 for two bundles. If you are a teacher don't forget to ask for the teacher discount! They also have artificial flowers at Hobby Lobby, Wal-mart, Dollar Tree, etc.
You can pick out any style flower you want. I picked out a Sunflower bundle and a Fall leaf bundle for fall. The floral tape was left over from my wedding bouquets but you can find it at any craft store or mass retailer such as Wall-mart.
10. If you haven't already, peal the labels off your glass bottles and place them in the wood crate once it is dry.
I used four clear glass bottles and filled them with newspaper. As you can tell the flowers by themselves were not very flattering so I came up with a way to hid the flower stems.
I tore up some newspaper and pushed it into the bottles. I then wrapped the flower stems with some newspaper and gently stuck them in the glass bottles. Wha-la you are done and have a beautiful fall centerpiece to help brighten up your home.
If you don't like the look of the newspaper you can fill the bottles with tissue paper, crinkled paper, use a darker bottle or paint the bottles to a color of your liking.
Where do I get glass bottles?
You can purchase any beverage that comes in a glass bottle and save the bottle or ask a friend or family member that may already purchase glass bottle beverages to save you a few.
Most supermarkets or liquor stores sell 6-packs of beverages that come in glass bottles. A lot of people recycle their glass bottles so you can always check with a recycling center. You can also check a craft store for a similar looking bottle.
Most supermarkets or liquor stores sell 6-packs of beverages that come in glass bottles. A lot of people recycle their glass bottles so you can always check with a recycling center. You can also check a craft store for a similar looking bottle.
Bottle Colors?
Clear Bottles: Redd's Apple Ale, Miller Light, Smirnoff Ice, Seagrams, Crush, Cream Sodas, Coca-Cola, AW Root Beer, some Teas
Blue Bottles: Bud Light Platinum
Green Bottles: Ale 8, Sprite, Heineken
Brown Bottles: Most Beer Bottles, Root Beer
This Thankful Wood Centerpiece is pretty easy to make as long as you can piece all the wood together the first try. It is also cheap to make if you have all the supplies at home already. All I had to purchase was the flowers which cost close to $5 and I re-pourposed items I already had laying around the house. If you are on a tight budget, try to be resourceful and use or re-use items laying around your house like I did.
The Thankful Wood Centerpiece is the perfect table centerpiece for fall, Halloween and Thanksgiving. Replace the flowers with something red, green and white and it would also work for Christmas.
The Thankful Wood Centerpiece is also the perfect size to set on a window seal or a book shelf for some added decor to any room. As I said before you can personalize it with any word, phrase or flower you like to better suit your home. Don't forget to be thankful this fall as there is always something to be thankful for!
The Thankful Wood Centerpiece is also the perfect size to set on a window seal or a book shelf for some added decor to any room. As I said before you can personalize it with any word, phrase or flower you like to better suit your home. Don't forget to be thankful this fall as there is always something to be thankful for!







0 Comments