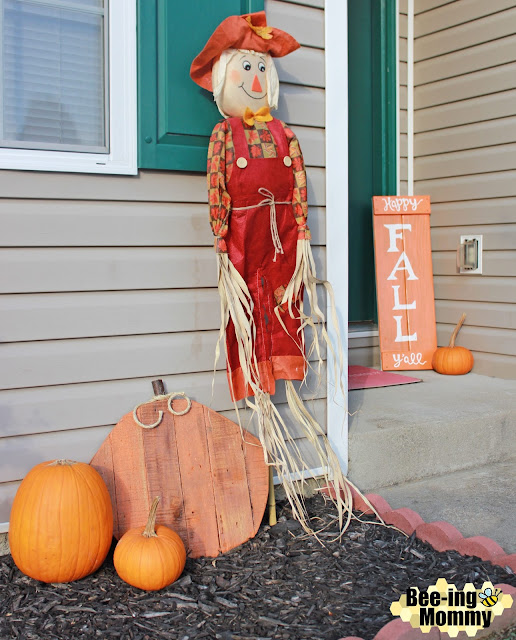
This fall I decided that we needed more fall decor around the house so I got to crafting with the help of my husband. We made a Thankful Wood Centerpiece, a reversible Happy Fall Y'all / Merry Christmas sign, and this Wood Pumpkin all out of wood scraps we had which make for inexpensive decor. I'm hoping I can talk my husband into helping me make a couple more wood pumpkins in various sizes for next year but we will see.
Supplies:
- 7+ wood scraps
- Pencil
- Saw
- Sander/ Sand Paper
- Hammer & Nails
- Paint & Stainer/ Paint brushes
- Wood Sealer
- Tree Branch
- Twine (Optional)
How To:
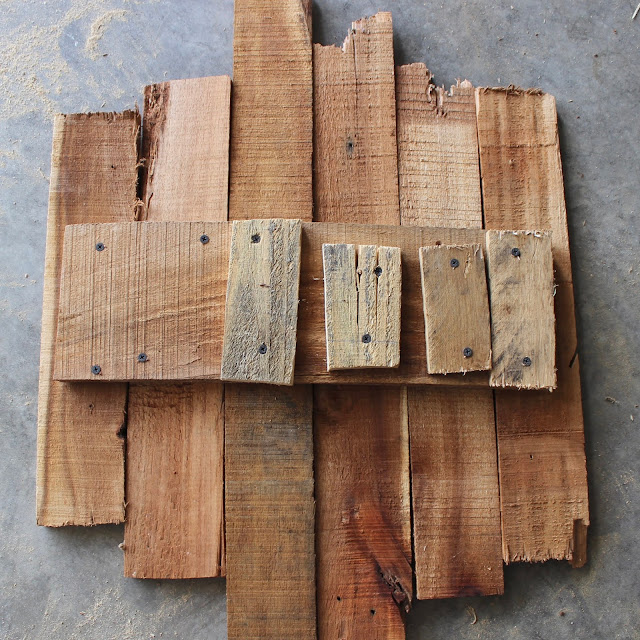
1. Line up your wood scraps and make sure there is enough room to cut out a pumpkin. Attach them together with a piece of wood across the middle in the back and some nails. This will help keep the wood pieces together when you cut it.
 |
| FRONT |
 |
| BACK |
2. Using a pencil, draw the shape of a pumpkin on the front of the wood.
3. Carefully follow your outline, cutting out the pumpkin shape.
4. Sand any rough edges.
5. Attach the pumpkin's stem. I cut a small branch off the tree in our front yard and attached it with a screw.
Here is how the back of the pumpkin looks. It isn't that pretty but it will be sitting up against your house so nobody will see it. My husband ran out of short nails/screws so added wood so they wouldn't poke through the front.
6. Paint and Stain your pumpkin however you would like. I stained a couple pieces of wood to make it look darker and painted the rest. I added some paint to some of the stained wood as well. Let Dry.
You can also leave the pumpkin it's natural wood color and just seal it, stain the whole pumpkin, rotate fall colors such as yellow, orange and white or paint it all the way orange.

7. Optional - Using sand paper, sand random parts of the paint and stainer off to give it a more rustic feel.
8. Seal the pumpkin with a wood sealer. Let Dry.
I used outdoor paint and stainer but since your pumpkin is going to be outside, the wood sealer will help the paint hold, add a shine and help the wood last longer in harsh weather.
9. Optional - Tie some twine or burlap around the stem for an added touch.
10. Set outside, add some pumpkins around it and enjoy!
You can make a few more wood pumpkins in various sizes to give it a different look. I already had all the supplies so this was a very inexpensive craft. I think most of the wood was from a pallet we took apart for another project so if you can get a pallet you can easily turn it into some cute pumpkins to decorate your home! A couple weeks after I set my wood pumpkin out I noticed someone down the street made some so it's safe to say they liked it too!
Find out how to make the "Happy Fall Y'all" Sign in the background HERE


1 Comments
Such a cute craft and something the kids can get involved with too. A great idea for those wooden scraps most of us have lying about!
ReplyDelete