When I was in middle school, we went on a field trip to a science museum and at the museum, our class got to make Skrinky Dinks. I remember sanding the plastic to make it rough then writing "Angel" on it with a halo in color pencil. I thought it was the coolest thing ever and I recently got to share the same experience with my daughter.
I had planned on making these keychains as Christmas gifts for everybody but saw that the Library had Skrinky Dinks as one of their arts and crafts days this summer and knew I had to take my daughter to it.
I had planned on making these keychains as Christmas gifts for everybody but saw that the Library had Skrinky Dinks as one of their arts and crafts days this summer and knew I had to take my daughter to it.
The Library supplied us with a page of the Shrinky Dink paper, coloring pencils, and several drawing pages for the kids to choose and trace onto the paper.
Since my daughter isn't even two yet and still can't grasp the concept of coloring in the lines, I let her scribble all over the Shrinky Dink paper. Sounds like a waste right?
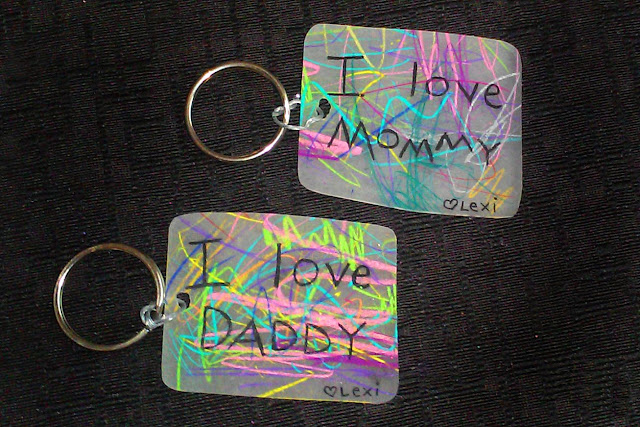
NOT! I turned her scribble art into fun keychain for mommy, daddy and both grandmas!
Since my daughter isn't even two yet and still can't grasp the concept of coloring in the lines, I let her scribble all over the Shrinky Dink paper. Sounds like a waste right?
NOT! I turned her scribble art into fun keychain for mommy, daddy and both grandmas!
Once my daughter was done coloring, I cut the Shrinky Dink paper into four rectangles, rounded the edges and wrote "I love Mommy", "I love Daddy" and "I love Grandma" on them.
When they started shrinking my daughter pointed at them and started doing her excited dance, it was to cute. I think she did a pretty good job coloring and I love how they turned out. Shrinky Dinks are fun and very easy to make, plus they make great gifts for relatives and the kids love to make them!
When they started shrinking my daughter pointed at them and started doing her excited dance, it was to cute. I think she did a pretty good job coloring and I love how they turned out. Shrinky Dinks are fun and very easy to make, plus they make great gifts for relatives and the kids love to make them!
Personalized Toddler Scribble Art Shrinky Dink Keychain
Supplies:
- Shrinky Dink Paper - this runs about $6 for 10 sheets
- OR #6 clear plastic - this is the clear plastic lids on carry out containers
- Coloring Pencils
- Hole Punch
- Scissors
- Pan lined with foil or parchment paper
- Oven
- Key Ring
- Optional - Drawing Pages: you can print these out or use a coloring book. This helps children create their favorite characters and objects by tracing them. *Trace instructions at the bottom
If you bought the Shrinky Dink paper packet from the store, follow the directions on it instead of mine!
1. Let your little one color the Shrinky Dink paper or #6 plastic however they choose. Make sure to use coloring pencils on the Shrinky Dink paper.
If you are using #6 plastic try sanding one side to make it rougher before you draw on it. If not then you may need to use sharpies.
2. Once your little one is done coloring, cut the objects out. Make sure to round all the edges. If you leave a pointed edge, it may become sharp once it shrinks.
I cut the Skrinky Dink paper in half both vertical and horizontal to make four rectangles.
I cut the Skrinky Dink paper in half both vertical and horizontal to make four rectangles.
One piece of Shrinky Dink paper makes four of these keychains.
3. Using a black coloring pencil or Sharpie, personalize the scribble art.
I wrote "I love Mommy", "I love Daddy" and "I love Grandma" on ours. You can personalize it however you want!
4. Using a hole punch, in the corner, make a couple holes close to each other to create a bigger hole.
DO NOT put one hole punch in the corner because it will be too small when it shrinks.
DO NOT put the hole super close to the edge because it can cause it to break easier with a key ring in it.
5. Line a metal pan with foil or parchment paper then place it in the oven at 350˚ for about 2 minutes.
The edges will roll up as it shrinks but it is okay as long as they don't touch each other and stick to the other side. Once your images flattens back out you can remove it from the oven and let cool. If needed, use a flat spatula to flatten the Shrinky Dink once removed from the oven.
DO NOT touch the Shrinky Dink until it is cool or you may burn yourself. Be carful!
6. Once your Shrinky Dink has cooled you can add a key ring. Clip it on your keys and enjoy!
I used picture hanging wire to make a smaller ring so the key ring would attach easier but you don't have to do this. You can use the tiny metal rings from a jewelry making kit, string, ribbon, twine, wire, etc... to make a key ring or hanger.
I used picture hanging wire to make a smaller ring so the key ring would attach easier but you don't have to do this. You can use the tiny metal rings from a jewelry making kit, string, ribbon, twine, wire, etc... to make a key ring or hanger.
Remember, If you bought the Shrinky Dink paper packet from the store, follow the directions on it instead of mine, this is just what we did.
If you are using #6 plastic it will most likely take less time to shrink so keep an eye on it in the oven.
If you used Sharpie on your #6 plastic you may need to spray it with acrylic spray after it shrinks so the sharpie won't rub off. If using Sharpie on regular Shrinky Dink paper, you should be fine.
If you don't want to make a keychain you can always just shrink the drawing, make your drawing into jewelry or an ornament. Shrinky Dinks can be made into a lot of different things. The possibilities are endless. I hope you enjoy making Shrinky Dinks as much as we did.
I'd love to know what you made in the comments below!
*Keep scrolling for tracing instructions, ornaments & hand prints!
Update:
Here are some fun ornaments my kids and I made for Christmas 2017:
toddler crafts, DIY gift idea, shrinky dinks, shrinky dinks keychain, gift for mom, gift for dad, kid gift, DIY craft, craft, shrinks dink, personalized gift, personalized gift from kids
Fall 2019, I made a family Shrinky Dink. I traced my three kid's hands, colored them in with coloring pencils and wrote their name in Sharpie by their handprint.. I then traced my husband and my thumbs to make a heart and wrote the name of our soon to be son in the middle of the heart.
Here is the before and after of the Shrinky Dink. Make sure to round the edges! I will say that it turned out bigger than I thought it would so I think I may turn it into a Christmas ornament for this year.
My kids are five and under so I was able to fit all their hands on one sheet of Shrinky Dink paper. If you have older kids you can cut around their hand print and make individual ones.
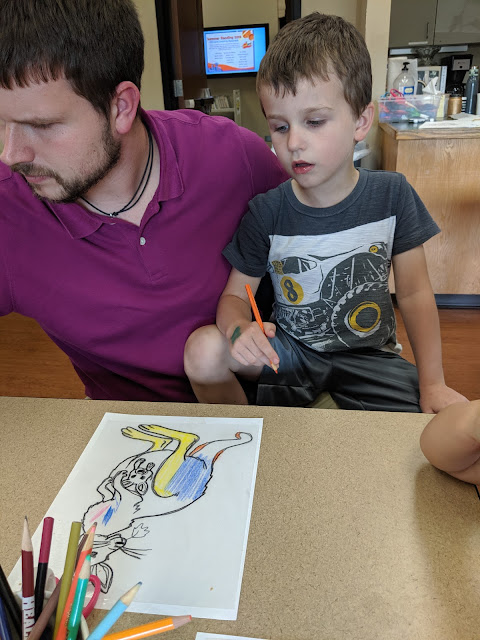
Incase you were wondering how the tracing a coloring page works, below is a picture of my son coloring his kangaroo. Basically find a coloring page you like, put the Shrinky Dink paper on top of it and tape it to the table. Trace the image using a black coloring pencil or Sharpie then color it in.
When cutting out, leave a little space around the outline and make sure all the edges are round!
Pin for later:


6 Comments
Love this idea! Could you tell me the dimensions of the art before and after? I'm wanting to make a class art project but would like to pre-cut for each child. Thanks!
ReplyDeleteAww, that would make a cute school project!!! For the "I love mom/dad" keychains I cut the shrinky dink paper in half both ways so the before pieces were roughly 4"x5". After, it depends on how much they shrinks they all can shrink differently but roughly 1.5"x2". Each page made four pieces. Don't forget to hole punch it before hand a few times. Good luck!!!
DeleteThank you!!
ReplyDeleteYou're welcome!!!
DeleteAwesome but where can i find shrink dinks in South Africa would really love to do a school project
ReplyDeleteI'm not sure where they are sold in South Africa, but you can try a local craft store, order online through Amazon, or you can use #6 clear plastic which is usually the lids on food.
Delete