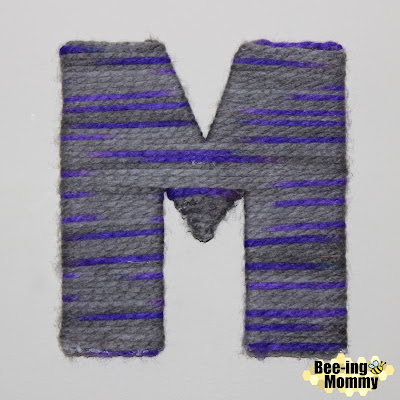
Since we've moved into our house I have talked about making an "M" wall being that "M" is our last initial. Ever since my husband made and gave me a Sea Shell "M" for Christmas, I have been collecting M's and recently decided to make a few. The yarn "M" was very easy to make and super cheap!
How you need to wrap your letter depends on the letter you are decorating, every letter is different. I am going to show you how I wrapped the letter "M".
 Supplies:
- Yarn - I used Wool-Ease Thick and Quick Yarn because it was the only color that matched our room but you can use any kind you'd like
- Hot Glue Gun & Glue Sticks
- Cardboard Monogramed Letter cut out
- Scissors
- 1-2 Soda Tabs
How To:
1. If you haven't already, cut out the your monogramed letter. I drew my letter the size I wanted with a sharpie and cut it out using an X-Acto knife. I used a diaper box for my cardboard.
2. Start at the bottom corner of your letter. Hot glue the end of the yarn on the back of your letter and wrap it around the front, hot glue the yarn onto the back. Add hot glue to the bottom of the letter and wrap the yarn on the bottom thus covering the whole bottom of the letter.
Only use the hot glue on the back of your letter to avoid seeing it through the yarn on the front.
3. Add a little hot glue to the back of your letter and begin to tightly wrap the yarn around the letter until you come to a stopping point. Cut the yarn and hot glue it to the back of your letter to secure it. Don't over do the hot glue because it dries fast.
4. If your letter has more than one corner or section like the letter "M" does, repeat steps 2 and 3 until your letter is completely covered.
I wrapped my letter, "M", in five different sections. Every letter will be different.
The middle point of the "M" was tricky to wrap because you want to cover the point. The picture below shows you how I stared wrapping the fifth section of my "M" to cover the point.
You might also like some of my other homemade monogramed letter tutorials:
Only use the hot glue on the back of your letter to avoid seeing it through the yarn on the front.
3. Add a little hot glue to the back of your letter and begin to tightly wrap the yarn around the letter until you come to a stopping point. Cut the yarn and hot glue it to the back of your letter to secure it. Don't over do the hot glue because it dries fast.
4. If your letter has more than one corner or section like the letter "M" does, repeat steps 2 and 3 until your letter is completely covered.
I wrapped my letter, "M", in five different sections. Every letter will be different.
The middle point of the "M" was tricky to wrap because you want to cover the point. The picture below shows you how I stared wrapping the fifth section of my "M" to cover the point.
5. When your letter is completely wrapped, cut and tie off the end of the yarn. I wrapped the end of my yarn around another piece of yarn on the back, tied a knot and hot glued it under the yarn. The knot helps secure the yarn and keep it from unraveling.
6. Add a hanger or two. Since I used cardboard for my letter I was able to hot glue a soda tab onto the back center of my "M" to hang it. Depending on the size and shape of your letter you may need to use two soda tabs.
If you have a wood letter I recommend using a saw tooth hanger to hang your wooden letter. The soda tab hanger works for my letter because it is very light.
Now that you are finished, hang your new Yarn Monogramed Letter up for everyone to see. The yarn letters are great for decoration, monogramed letter walls, baby shower gifts, etc. You can make them any color you want, any size you want and spell out any word or phrase you want. You can even use different yarn textures and sizes to give it a more rustic look. There are so many things you can do with the Yarn Monogramed Letters and the benefit is that they are super easy to make and cheap. Comment below with what color scheme you decided to go with and how it turned out!
You might also like some of my other homemade monogramed letter tutorials:
- DIY Monogramed Letter - Black & Gold Dots
- DIY Monogramed Letter - Buttons
- DIY Monogramed Letter - Sea Shells
- DIY Monogramed Letter - Wine Corks
- Unity Painting - we added a monogramed letter to our unity painting after the wedding


0 Comments